An Electrical Novice Takes On Raspberry Pi and Claude Code | Betting on Myself 3 Months From Now
My journey combining Raspberry Pi with Claude Code for hardware development. A software engineer's first steps into the world of electrical circuits.
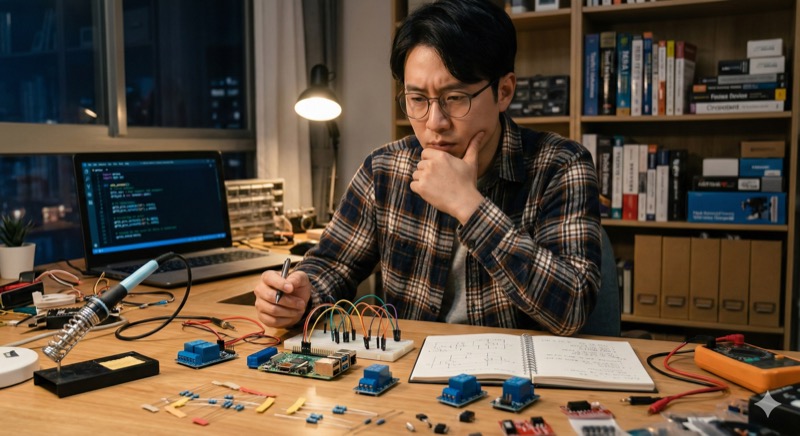
Lately, I've been running test after test combining Raspberry Pi with Claude Code. I'm not at the full implementation stage yet — still in the planning phase, shaping ideas into something concrete. But even at this early stage, the realization that "AI really does write code for you" grows stronger every day.
A World Where Software Alone Isn't Enough
In web development, you write code, deploy it, and things work. If there's an error, you can see it on screen and fix it quickly. But the world of Raspberry Pi and Arduino is completely different.
When it comes to Python and Arduino coding, Claude Code performs remarkably well. Beyond syntax explanations, it provides concrete code for GPIO control and sensor reading logic. Say "I want it to do this," and it walks you through everything from library installation to implementation code.
But here's where things get tricky. Even with perfect software, nothing actually happens without physical wiring. You have to connect real wires to the Raspberry Pi's GPIO pins. And this "physical connection" is where I'm feeling the fundamental difference between software and hardware development most acutely.
The Tension of One Wrong Wire
In web development, a code mistake crashes the app at worst. You might lose some data, but there's virtually no physical danger.
Hardware is a different story. Get one pin number wrong and you might fry a sensor. Miscalculate a resistance value and excessive current could burn out components. Worst case, the Raspberry Pi itself gets destroyed.
So every time I wire something up, I check and double-check. I keep the GPIO pinout diagram right next to me, verifying that the pin numbers in my code match the physical pins I'm connecting to, wire by wire. I cross-reference resistance values against formulas and datasheets to confirm they're within tolerance. This level of caution is something I never experienced in web development.
I'll be honest — in the early days, my hands literally trembled just plugging wires into the breadboard. "Is this connection actually right?" "Did I wire it backwards?" "Is there a short circuit?" Every single connection demanded a kind of nervous attention that's completely different from typing code on a keyboard.
Beyond 5V Lies the Fear of 220V
And the tension ratchets up even further when dealing with household power.
Raspberry Pi's GPIO operates at 3.3V or 5V. At these low voltages, even a wiring mistake won't pose any danger to a person — at worst, you blow a component.
But when you actually want to make things move, you inevitably hit situations where you need to connect to household power. In Korea, that's 220V (in the US it's 120V, but even that demands serious respect). A shock from mains voltage can cause serious injury.
To control high voltage from a Raspberry Pi, you use a relay module. A relay is essentially a switch that lets a low-voltage signal turn a high-voltage circuit on and off. The Raspberry Pi sends a 3.3V signal through GPIO, the relay activates, and the high-voltage circuit switches. The theory is simple, but actually handling mains wiring as someone without an electrical background is frankly scary.
"Is the relay actually providing proper isolation?" "Are any connections loose?" "What if there's a current leak?" These worries are always in the back of my mind. But I keep moving forward, verifying safety at each step. I read through relay module spec sheets, compare rated current against actual load, and test with a multimeter before powering anything on. Skipping these steps is never an option.
Self-Teaching with Five Books and AI
Right now, I'm reading about five books in parallel to build my foundation in this space. Books on Raspberry Pi applications, electrical circuit fundamentals, and practical electronics knowledge for hardware projects.
I plan to read each one at least five times. First pass: get the big picture. Second pass: highlight key sections. Third pass and beyond: work through the material hands-on. This repetitive learning style works best for me. Reading a book once gives you only surface-level understanding. It's through multiple reads, each accompanied by hands-on experimentation, that knowledge truly becomes your own.
For questions the books can't answer and for the latest information, AI and YouTube are invaluable resources. Claude Code in particular handles not just coding questions but circuit design consultations too. Asking specific questions like "What resistance value is appropriate for this sensor?" or "How should I connect this relay module?" and getting reasoned answers is tremendously helpful.
Of course, I don't take AI's answers at face value — especially when it comes to hardware, where wrong information can cause physical damage. That's why I always cross-reference AI's responses against books and datasheets. This "AI + books + experimentation" triangle is my current learning framework.
Investing in the Me of Three Months From Now
If I maintain this pace, I believe I can reach a level where I'm developing fairly independently in about three months.
Three months obviously won't make me an electrical expert. But I want to get to where I can design basic circuits, handle GPIO control confidently, and safely manage high-voltage control through relays. Getting there requires moving my hands every single day, even if just a little.
The truth is, my web development journey started the exact same way. At first, I was completely lost — I couldn't even understand error messages. But by writing code every day and solving problems one by one, I gradually became capable of building applications on my own.
I believe hardware development follows the same path. The initial fear stems from lack of knowledge and experience. Build the right knowledge and internalize safe procedures, and that fear will naturally fade.
The Possibilities Where Software Meets Hardware
Web development skills combined with hardware control skills. When these two come together, the range of what you can build expands dramatically.
Imagine displaying sensor data on a real-time web dashboard, remotely controlling home appliances from a smartphone, or having AI image recognition results drive motor control. Things that aren't possible with software alone or hardware alone become achievable when you have both skill sets.
For someone like me who went from zero programming experience to web development, this is an exhilarating next chapter.
The road won't be easy, of course. The tension of handling mains wiring probably won't ever fully disappear. But with the right knowledge and a careful approach, even non-electrical-engineers can safely take on hardware development.
I'm still in the foundation-building phase, but my goal is to come back to this blog in three months and report, "Here's what I built." Until then, I'll keep reading, keep tinkering, keep consulting AI, and keep moving forward one step at a time.
If you're also thinking about diving into hardware development, I hope this article gives you some useful perspective.